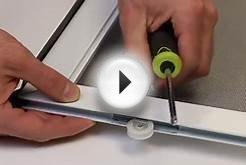
 Spring hinges close the door automatically to keep the bugs out.
One of the advantages of screen doors is that they allow air to circulate while keeping out insects, but your door won't do that if you leave it open. Installing spring hinges is one way to be sure the door closes every time someone uses it. Unlike regular hinges, spring hinges mount on the surface of the door, so installing them is easier than installing regular door hinges. The only difficulty you'll encounter is keeping the first hinge splayed open while you attach it to the door. After the first hinge is on, the rest is easy.
Lay the door face-up on flat surface, such as a pair of sawhorses. Stretch a tape measure along the hinge-side of the door and make a mark on the edge with a pencil to indicate the center.
Measure between the center mark and the top of the door and mark the midpoint, then make a similar mark between the center and bottom. The two latter marks denote the centers of the hinges.
Open one of the hinges and lay it flat on the edge of the door. Center it on the top mark with the barrel flush with the edge of the door and the hole for adjusting the tension facing the top of the door.
Drive three of the screws that came with the hinge with a screwdriver to hold it to the door. The hinge will close around the edge of the door when you stop holding it open.
Open the hinge again and set the door into the opening so that the hinge lies flat against the trim or wall along the side of the door. Lift the door until the gap between its top and the door frame is about 1/2 inch and screw the hinge to the door frame. If the door frame is already trimmed, pry off the trim with a pry bar before installing the door.
Open the other hinge and center it on the mark at the bottom of the door with the barrel flush with the edge of the door and the tension hole facing up. Hold it against the door while you drive one screw into the door and tighten it.
Straighten the hinge, if necessary, and drive a screw into the trim or the wall. Finish installing the hinge by driving the rest of the screws.
Install the trim on the side of the door with the hinges. You can lay the trim right over the side of the hinge screwed to the door frame or you can cut notches for the trim with a jigsaw.
Test the door by opening and releasing it. It should not slam shut. If the door doesn't close, or it closes too fast, adjust the spring tension with a tension adjustment tool. Do this while the door is closed.
Insert the tool into the adjustment or hex hole and turn it clockwise to increase tension or counterclockwise to reduce it. Insert a locking pin into the hole on the side of the barrel to maintain the new tension.
Things You Will Need
- 2 sawhorses
- Tape measure
- Screwdriver
- Pry bar
- Jigsaw
- Tension adjustment tool
- Locking pin
Tip
- The tension adjustment tool and locking pin come with the hinges.
- If your door is heavy, add a third hinge on the center mark.


if you go to some of your local independent hardware shops or repair they may have old parts... that's what we did for replacement parts needed for an OLD garage door opener....